

iOS App
In this section, we will guide you through the building of the iOS app.
Prepare your Apple developer account
-
First you need to create a new Apple Developer Account if you don't have one yet https://developer.apple.com/account/
-
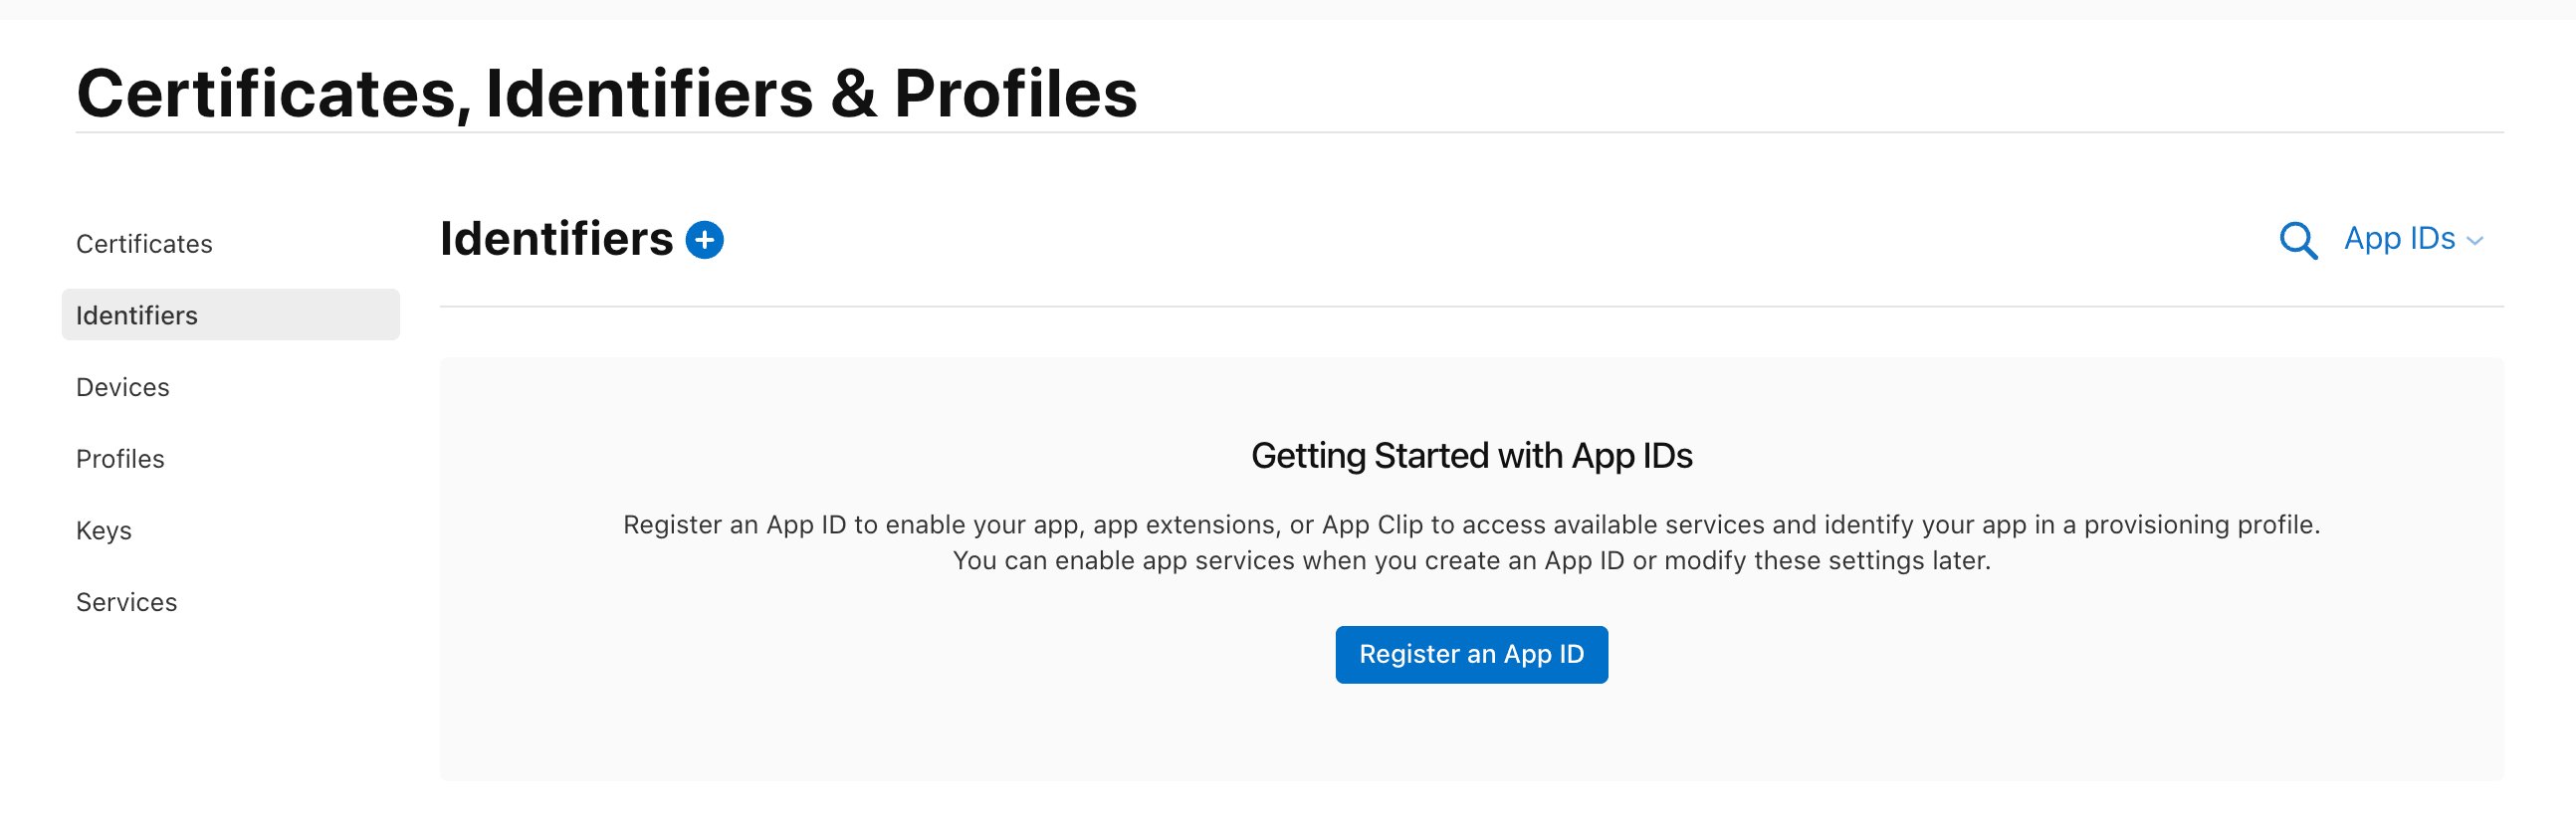
You need to create a new App ID if you don't have one yet https://developer.apple.com/account/resources/identifiers/list
Configure the project in Xcode
-
Open the
ios/Runner.xcworkspacefile in Xcode and wait for the project to be indexed and ready.
-
Select the Runner project from the left sidebar and click on the Runner target.
Change the Team to your Apple Developer Team. Also change the Bundle Identifier to the one you created in the previous step.
In App Groups section, you need to add a new App Group like
group.YOUR_APP_BUNDLE.onesignal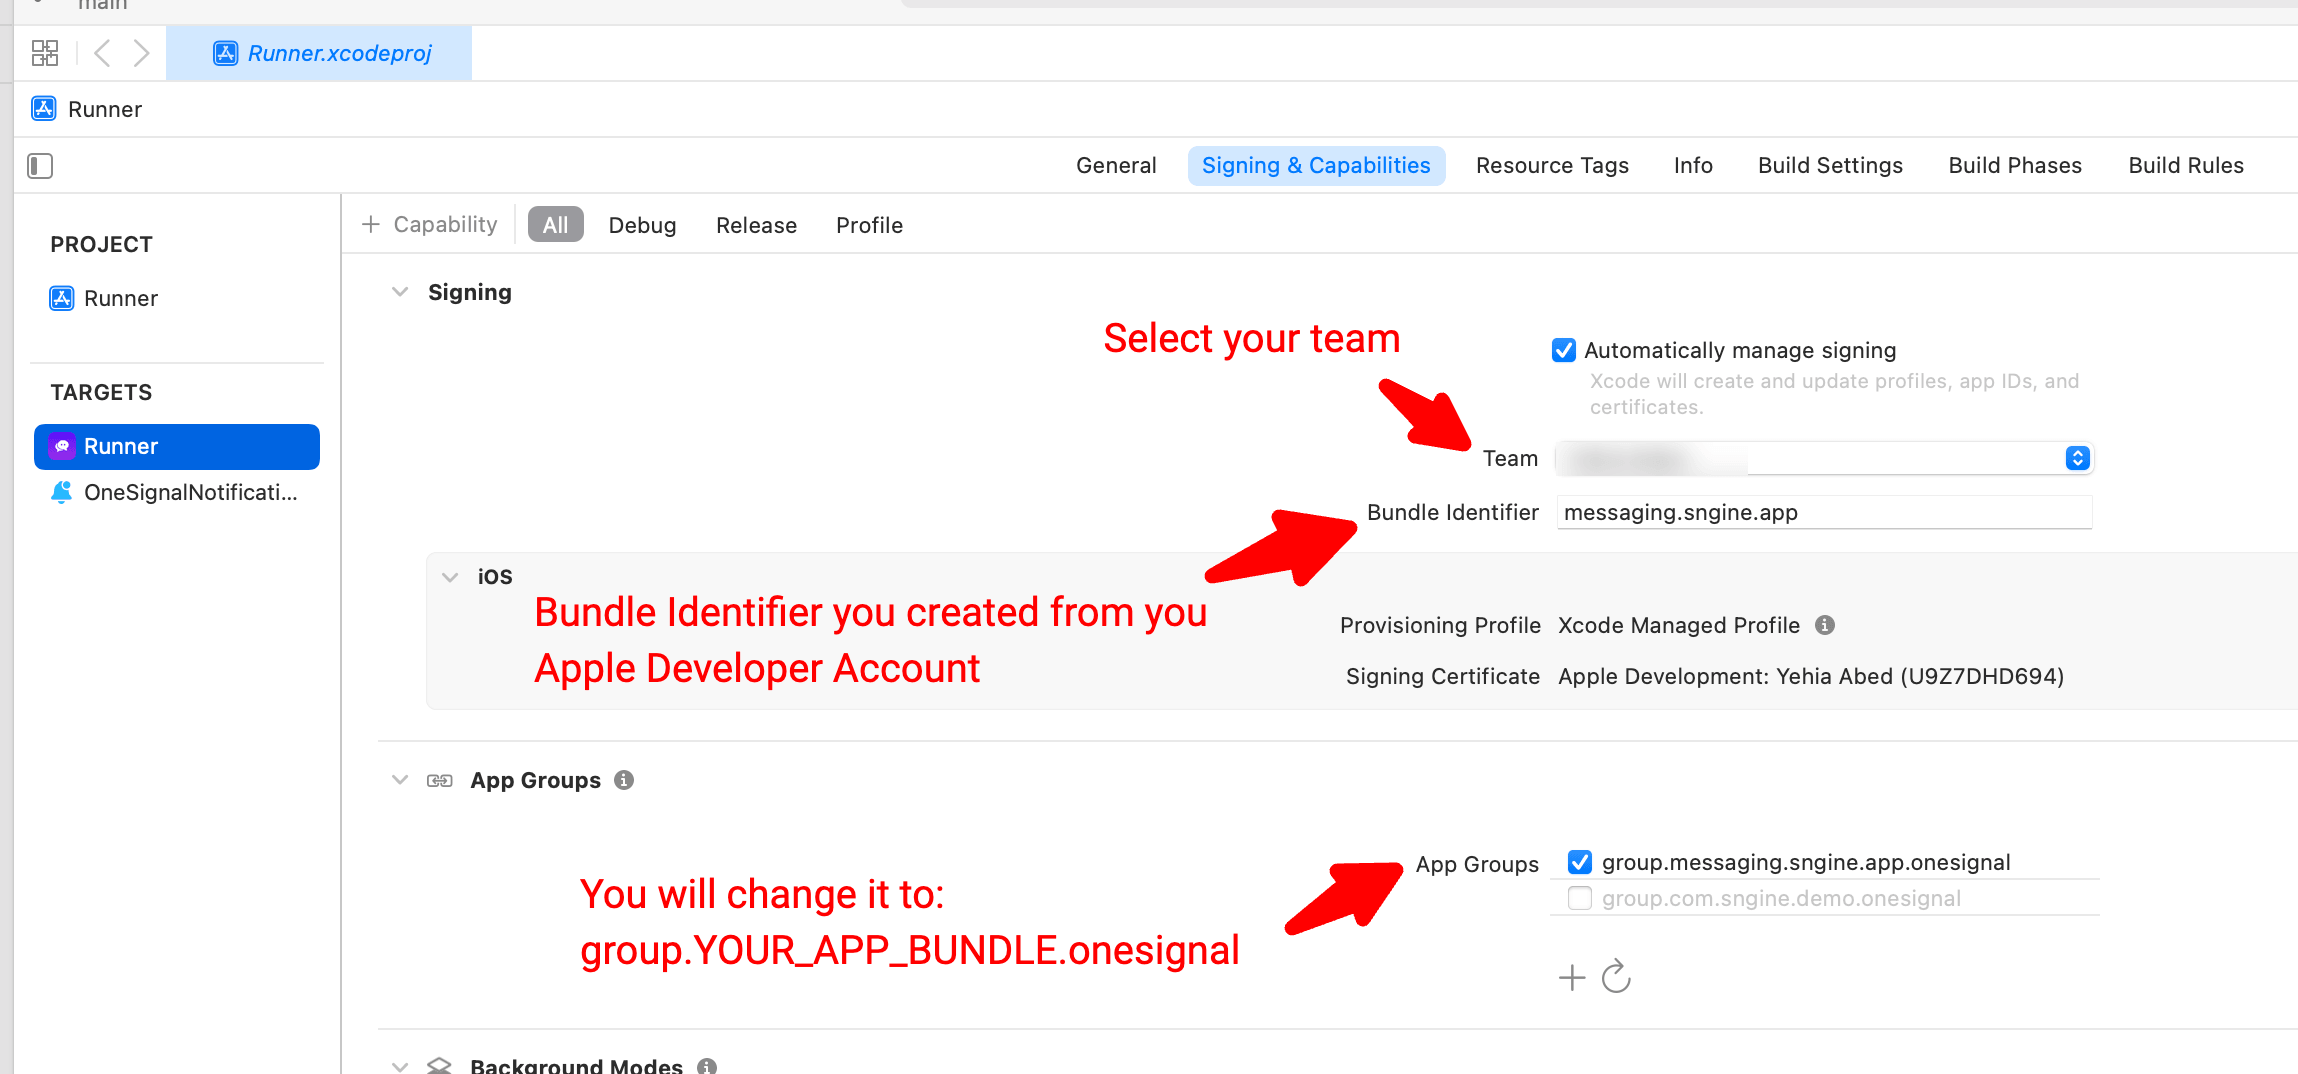
-
Change the target to OneSignalNotificationServiceExtension and change the Team to your Apple Developer Team.
You need to change the Bundle Identifier to
YOUR_APP_BUNDLE.OneSignalNotificationServiceExtension.In App Groups section, you need to add the same App Group as the main app
group.YOUR_APP_BUNDLE.onesignal.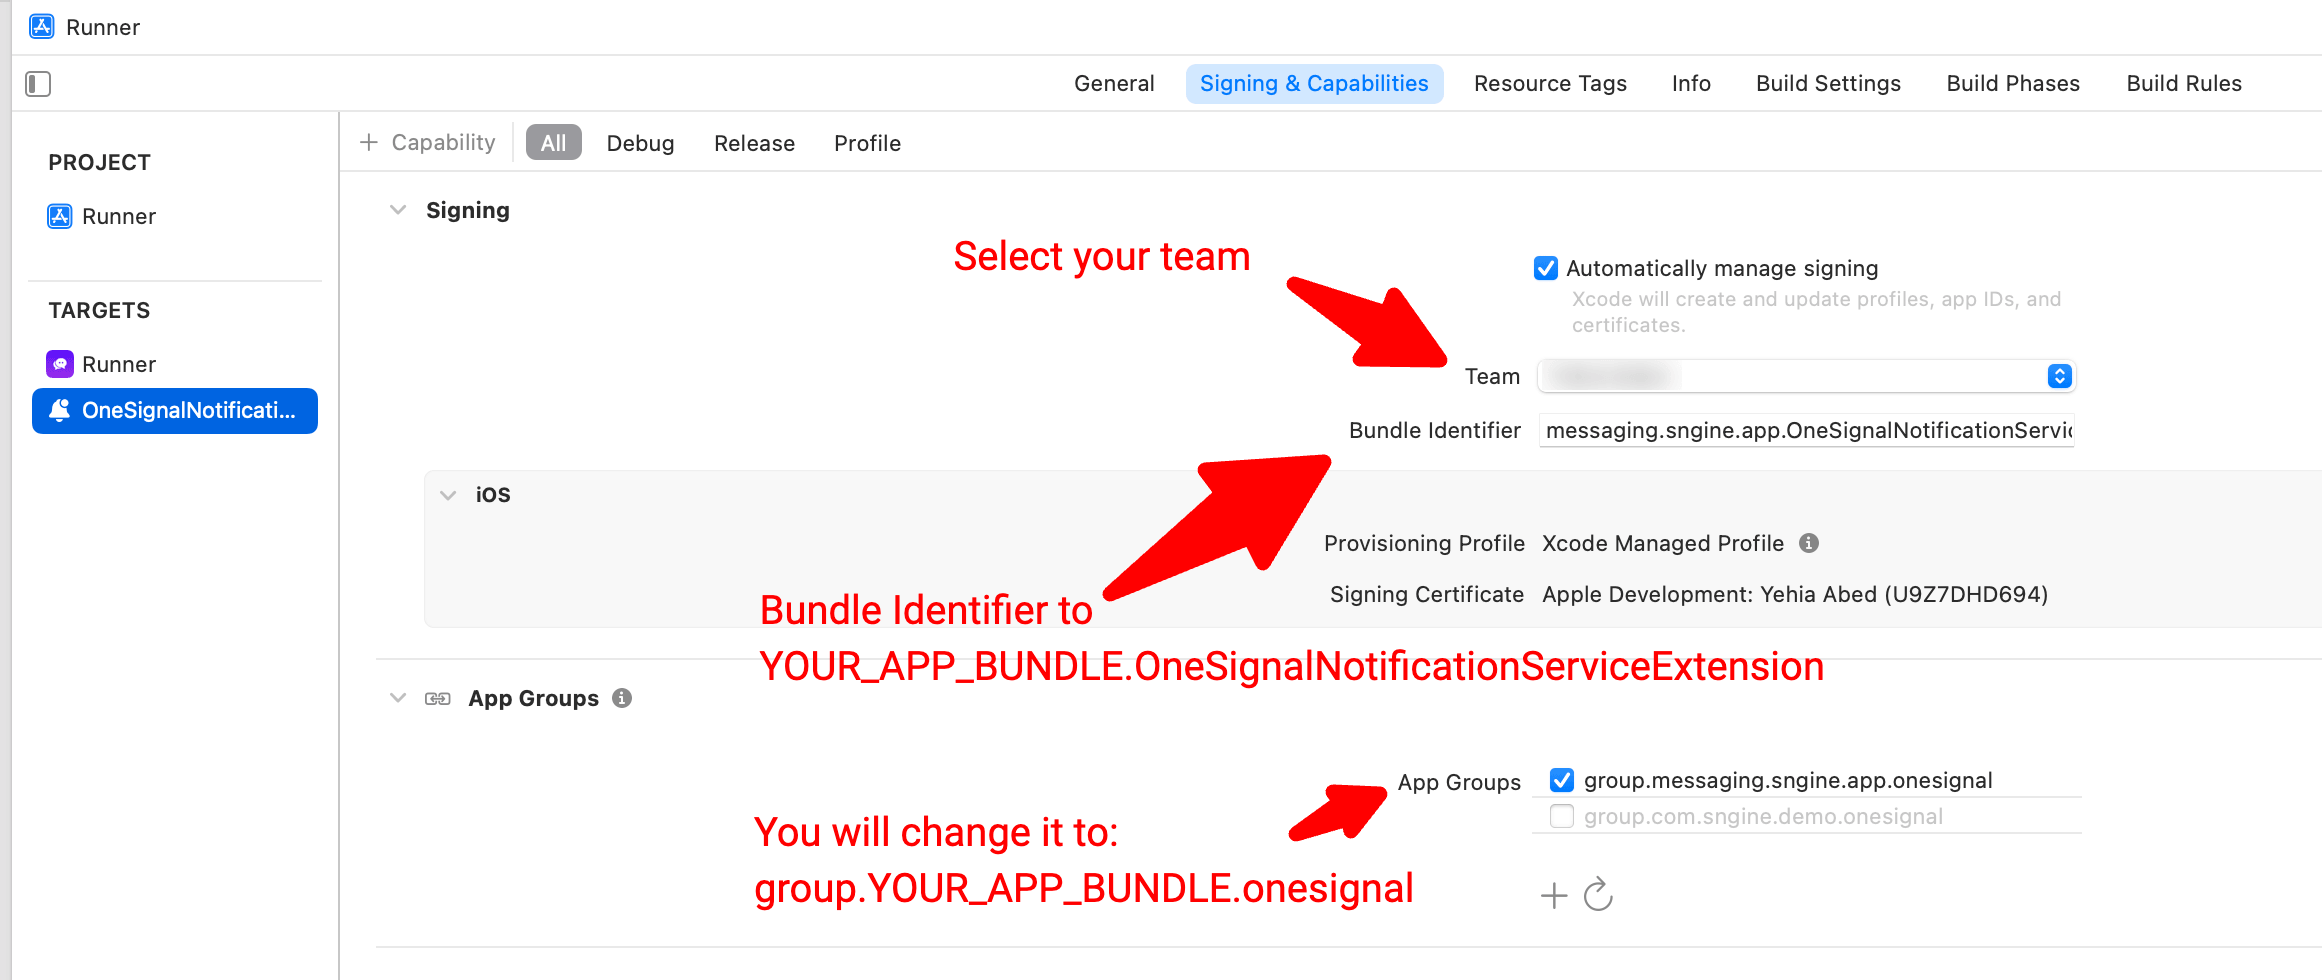
Publish to App Store Connect
-
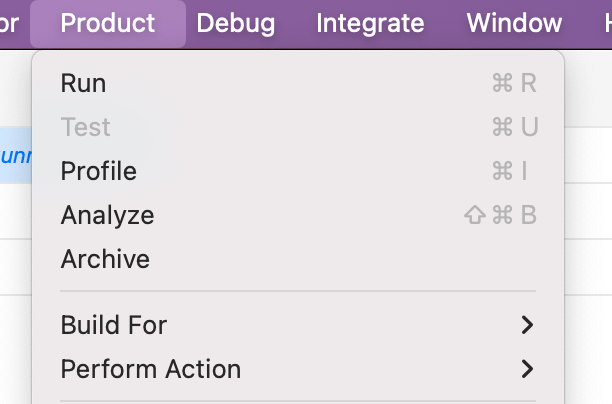
You can publish the app by selecting from the menu Product > Archive.
-
You can select the Distribute option and then select the App Store Connect option.
-
You will follow the steps to upload the app to App Store Connect.