Documentation
Sngine Messaging Apps for Android & iOS
This documentation will guide you through the setup, customization, and publishing process of the Flutter apps for both Android and iOS platforms for Sngine Messaging Apps.
- Version: 2.1
- Author: Zamblek
- Created: May 2025
- Updated: Jun 2026
File Structure
After downloading the Sngine Messaging Apps zip file from CodeCanyon and extracting it, you will need the Source folder to build the apps.
The file structure of the source code inside this folder Source is as follows:
/android
/ios
/assets/ # App assets (images, icons, etc.)
/lib/
  └── common/
      └── config.dart # Main configuration file
      └── themes.dart # App theming
  └── routes/
  └── screens/ # All screens
  └── states/
  └── utilities/
  └── widgets/
  └── main.dart # Main file
/analysis_options.yaml
/pubspec.yaml
Prerequisites
- Sngine: Latest Version (v4.4 or higher)
- Flutter SDK: Latest Version
- Visual Studio Code with
Flutter & Dartplugins (for app configuration & customization) - Android Studio (for building Android app)
- Xcode (for building iOS app)
- OneSignal Account (for push notifications)
Installation
Before you start, you need to install Android Studio (For Android) and Xcode (For iOS) and Flutter then set up your development environment.
Sngine Installation
You can follow the Sngine installation guide from here Sngine Installation Guide
Visual Studio Code Installation
You can download Visual Studio Code from here Visual Studio Code
You can insall Flutter & Dart plugins from here Flutter & Dart Plugins
Flutter Installation
You can follow the Flutter installation guide from here Flutter Installation Guide
Android Studio Installation
You can download Android Studio from here Android Studio
You can insall Flutter & Dart plugins from here Flutter & Dart Plugins
Xcode Installation MacOS
You can download Xcode from here Xcode
Configuration
In this section, we will guide you through the configuration of the apps like APIs Settings, Push Notifications, and App Configuration.
APIs Settings
First thing you need to make sure you are ruuning Sngine latest version (v4.0 or higher) and now you need to configure your API settings.
-
Go to your Sngine admin panel then APIs Settings

-
If you don't the keys generated, you can generate them from here Reser API Key and the same for JWT Key for Reset JWT Key
Then your need to check if it's working fine by clicking on Ping API button till you see the success message like this:

-
Now you need to copy the API Key and API Secret and paste it in the apps
config.dartfile as will be shown shortly.
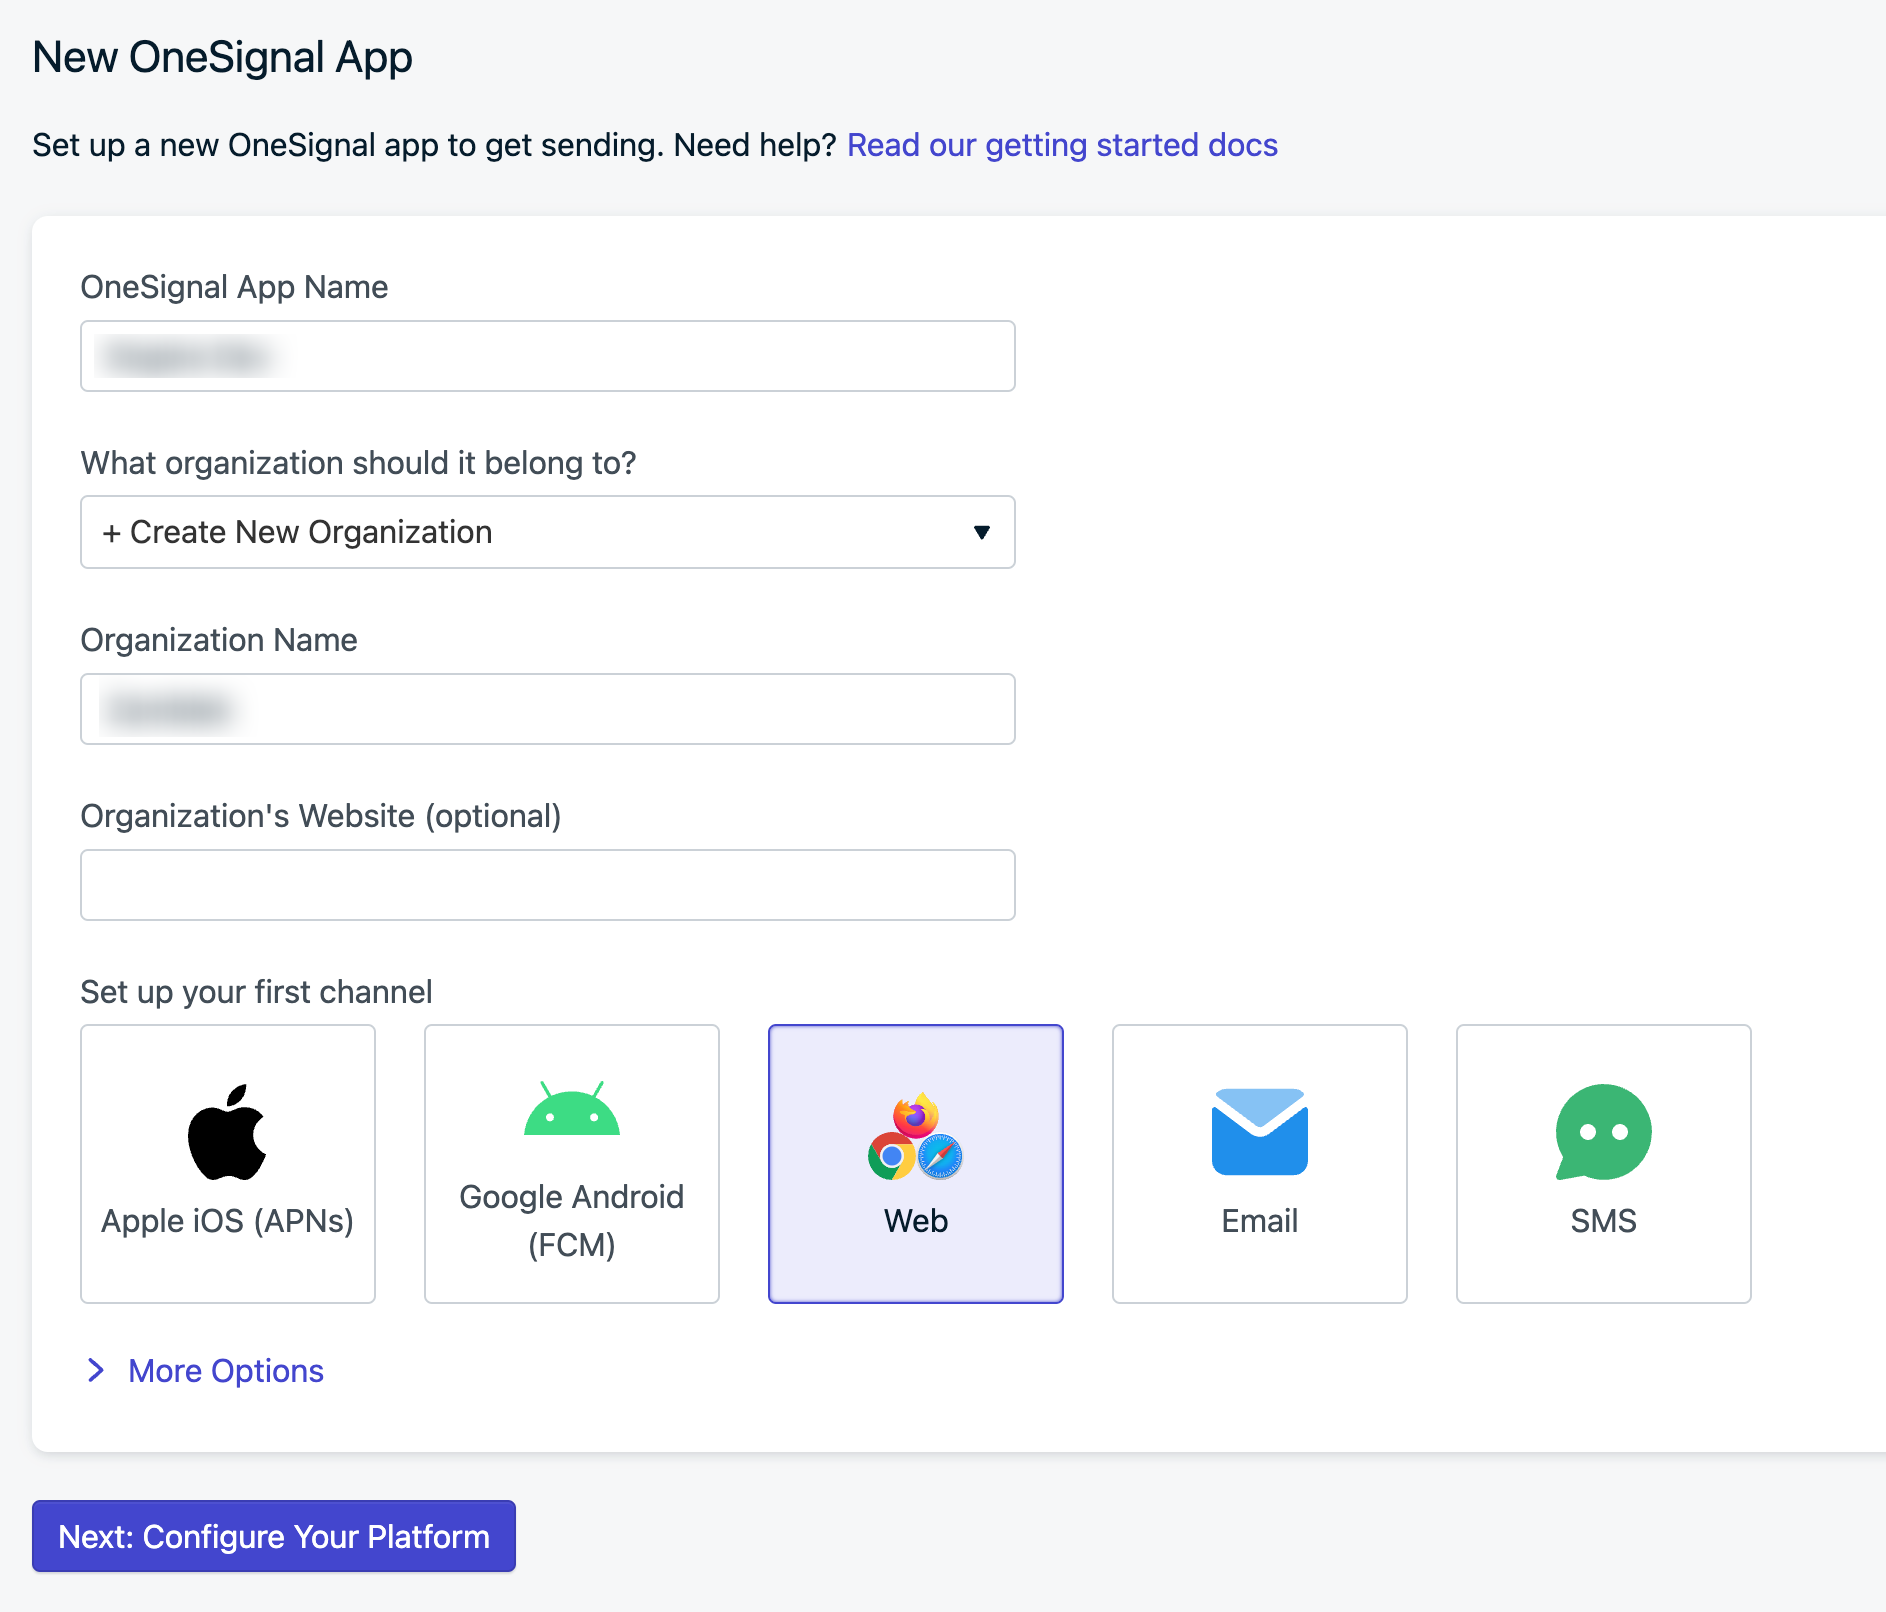
Push Notifications
In this section, we will guide you through the configuration of the push notifications for the apps.
-
First of all you need to configure the push notifications in your Sngine admin panel for the messging apps as we shown in the Sngine documentation Push Notifications Setup
-
Now you need to copy the OneSignal App ID and paste it in the apps
config.dartfile as will be shown shortly.
App Configuration
In this section, we will guide you through the configuration of the app.
-
After open the source code folder then go to
lib/common/config.dartfile and you will see the configuration file as will be shown in the screenshot below:You will paste the API Key, API Secret and OneSignal App ID in the
config.dartfile as will be shown in the screenshot below:For apiURL it will be the URL of your Sngine server like
https://demo.sngine.comwithout the/at the end
-
Now you need to run the following command to install the app dependencies.
flutter pub getYou can also open the
pubspec.yamland click on Get Packages button to install the dependencies.

-
And that's it, you have successfully configured the app. Now you can customize the app as you want.
Running The Apps
In this section, you will learn how to run the apps on your device.
-
You need to run the app to make sure it's working fine and connected to your Sngine server using the API keys you configured in the previous sections.
-
From Visual Studio Code, you can run the app on your device by clicking on the Run button after open
lib/main.dartfile then select your device from the list.

-
This step will take a while to build the app and then you will see the app running on your device.


-
Now you can see the app running on your device and you ready to customize the app as you want.
Customization
In this section, we will guide you through the customization of the app like App Name, App Icon, and App Colors.
App Name
In this section, we will guide you through the customization of the app name.
-
You can change the app name from 2 files
android/app/src/main/AndroidManifest.xmlandios/Runner/Info.plist
App Icon
In this section, we will guide you through the customization of the app icon.
-
First you will need to have your app icon as
JPGorPNGfile with the size of1024x1024pixels. -
You will use this online tool to generate the app icon for Android and iOS https://www.appicon.co/ You will drag and drop your app icon to the tool and then you will click on the Generate button.

-
You will get a
ZIPfile with the app icon for Android and iOS.
-
For Android, you will need to copy/paste what's inside the
Androidfolder toandroid/app/src/main/resfolder. -
For iOS, you will need to copy/paste the followings files
appstore.png,playstore.pngandAssets.xcassetsfolder toios/Runnerfolder. -
And that's it, you have successfully changed the app icon.
App Colors
In this section, we will guide you through the customization of the app colors.
-
You can change the app colors from
lib/common/themes.dartfile.
App Images
In this section, we will guide you through the customization of the app images.
-
You can change the app images from
assets/imagesfolder.
-
The image you want to change must be with same name and extension as the original image.
Building The Apps
In this section, we will guide you through the building of the apps for Android and iOS.
Building Android App
In this section, we will guide you through the building of the Android app.
-
First you will need to change your app bundle ID to a unique one in the following files:
android/app/build.gradle.ktsandroid/app/src/main/kotlin/com/example/sngine_messenger/MainActivity.kt
-
Select the Android folder from your source code folder and open it in Android Studio.
-
Once the Android Studio is open let the Gradle build the app.

-
Once the Gradle build is finished, you can select from the menu Build > Generate Signed Bundle / APK....


You will need to generate the keystore file and then you will select the AAB option.

-
You will see the
AABfile in the folder you selected to save the file.
Building iOS App
In this section, we will guide you through the building of the iOS app.
-
First you need to create a new Apple Developer Account if you don't have one yet https://developer.apple.com/account/
-
You need to create a new App ID if you don't have one yet https://developer.apple.com/account/resources/identifiers/list

-
Open the
ios/Runner.xcworkspacefile in Xcode and wait for the project to be indexed and ready.
-
Select the Runner project from the left sidebar and click on the Runner target.
Change the Team to your Apple Developer Team. Also change the Bundle Identifier to the one you created in the previous step.
In App Groups section, you need to add a new App Group like
group.YOUR_APP_BUNDLE.onesignal
-
Now change the target to OneSignalNotificationServiceExtension and change the Team to your Apple Developer Team.
You need to change the Bundle Identifier to
YOUR_APP_BUNDLE.OneSignalNotificationServiceExtension.In App Groups section, you need to add the same App Group as the main app
group.YOUR_APP_BUNDLE.onesignal.
-
Now you can publish the app by selecting from the menu Product > Archive.

-
Now you can select the Distribute option and then select the App Store Connect option.
-
You will follow the steps to upload the app to App Store Connect.
FAQ
Explore answers for the frequently asked questions related to how to install and run Sngine.
General
https://www.facebook.com/groups/sngine
https://codecanyon.net/user/zamblek#contact
Support
If you have any questions that are beyond the scope of this documentation, Please feel free to contact us via Support Center
We are located in GMT +2:00 time zone and we answer all questions within 12-24 hours in weekdays. In some rare cases the waiting time can be to 48 hours. (except holiday seasons which might take longer).
Don't forget to Rate Sngine
Go to your CodeCanyon Profile > Downloads Tab > & then You can Rate & Review for our script.
Thank You.
Changelog
See what's new added, changed, fixed, improved or updated in the latest versions.
Version 2.1 (31-05-2026)
- updated Documentation
- updated System Security
- updated System Optimization
- added Manage Blocking
- added Conversation Info Screen
- added Report Conversation
- fixed Names With HTML Entities
- fixed Minor Bugs
Version 2.0 (20-12-2025)
- updated Documentation
- updated System Security
- updated System Optimization
- added Messages Deletion
- added Messages Reactions
- added Messages Copy
- added Messages Report
- added Chat Attachments (Videos) (Recording / Uploading)
- fixed Minor Bugs
Version 1.0 (23-05-2025)
- initial Initial Release